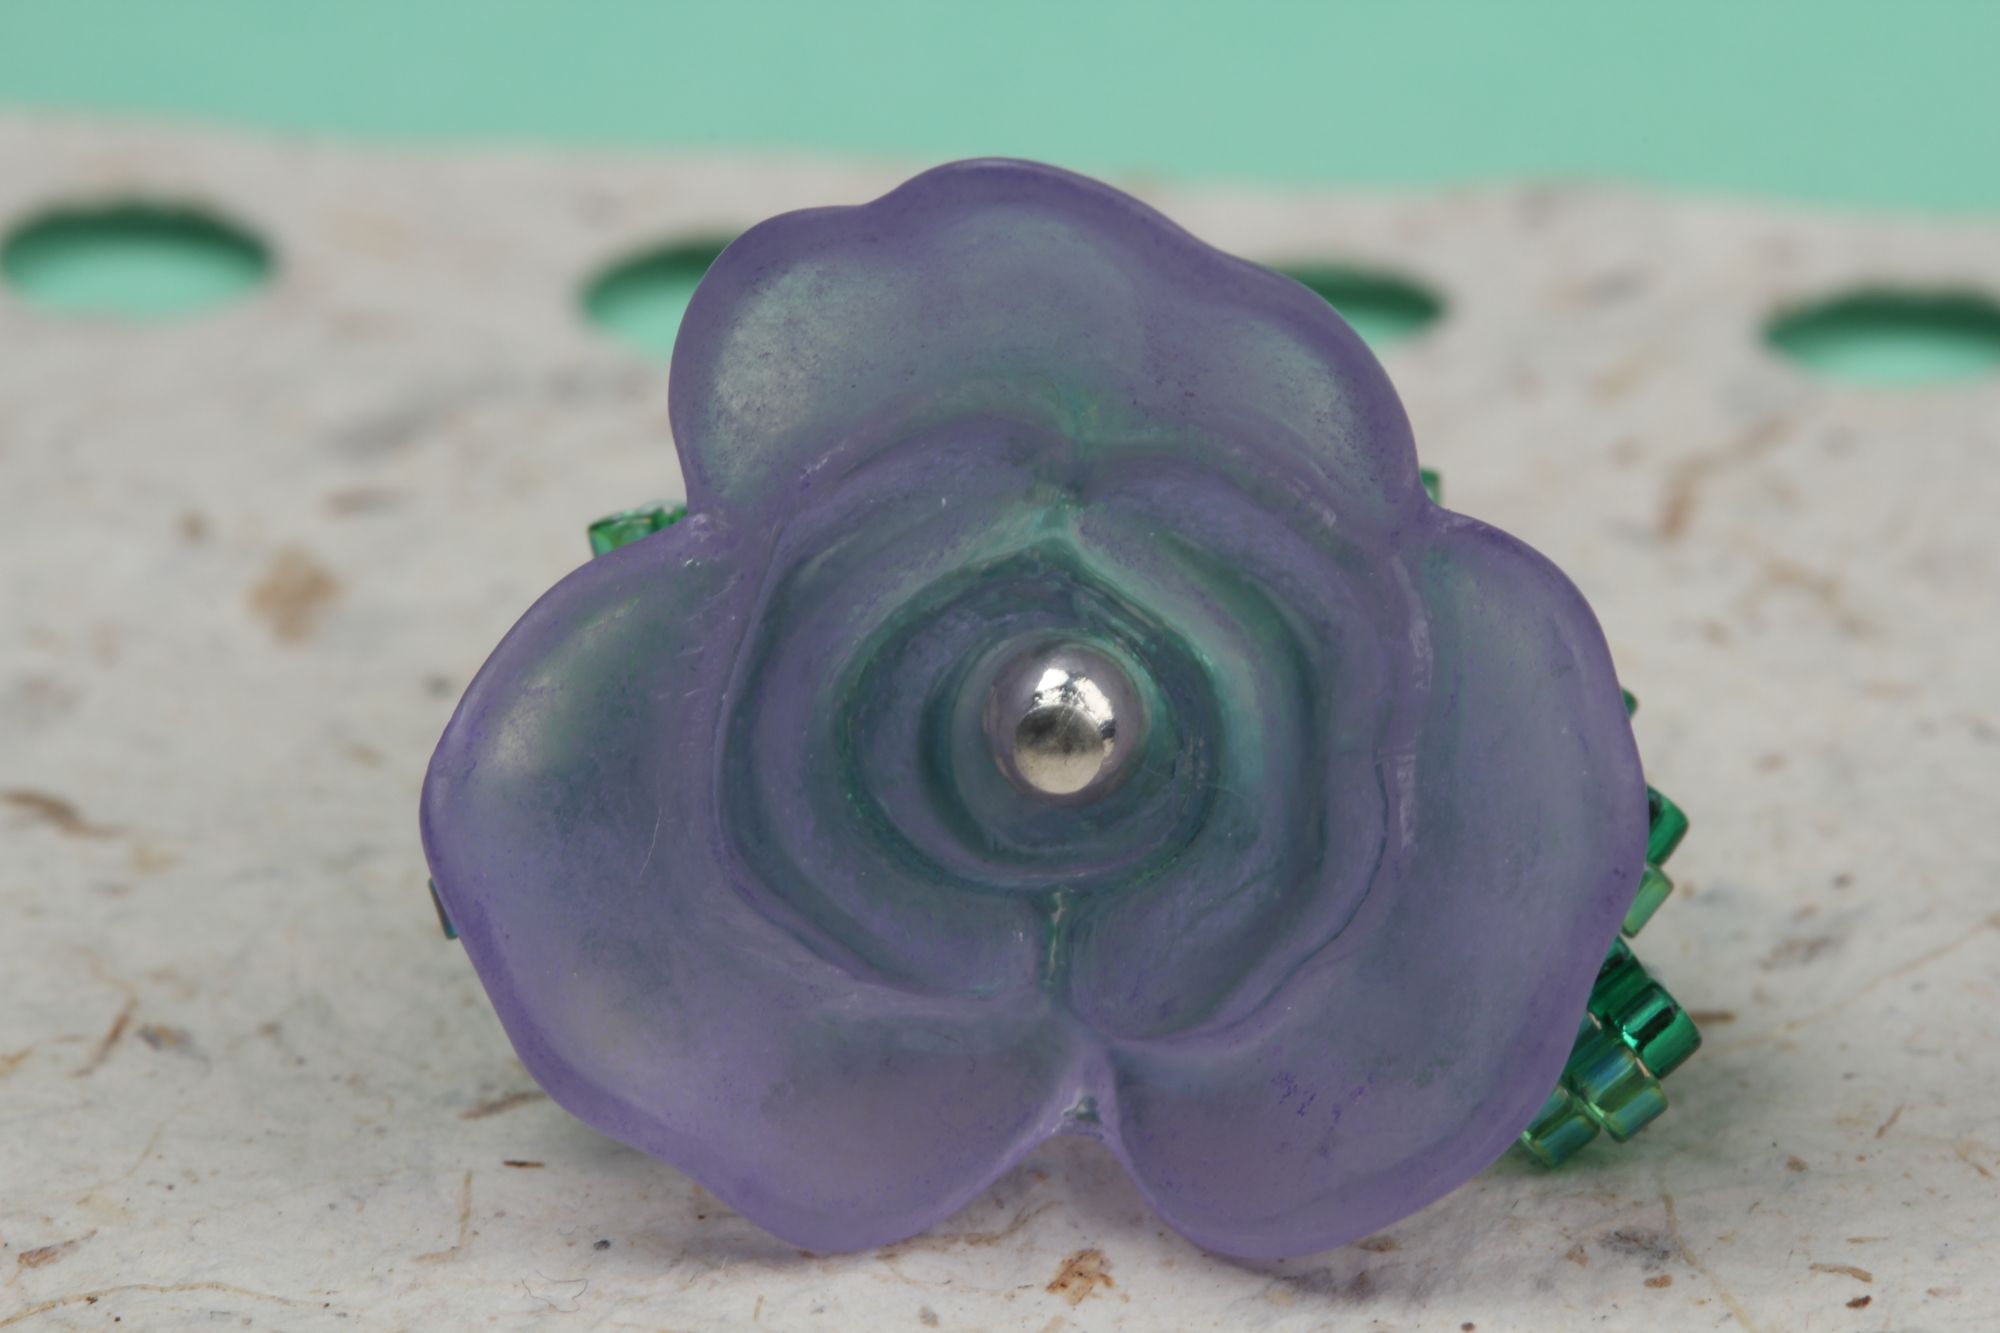
There is a bit of an art to reading a brick stitch pattern and working out how to add shaping, so we’ll be giving you a guide to the tips, tricks and techniques for doing this. Once you have read through the guide, there's a quick earring project that will let you put all these tips into practice.

Tips for reading Brick Stitch patterns
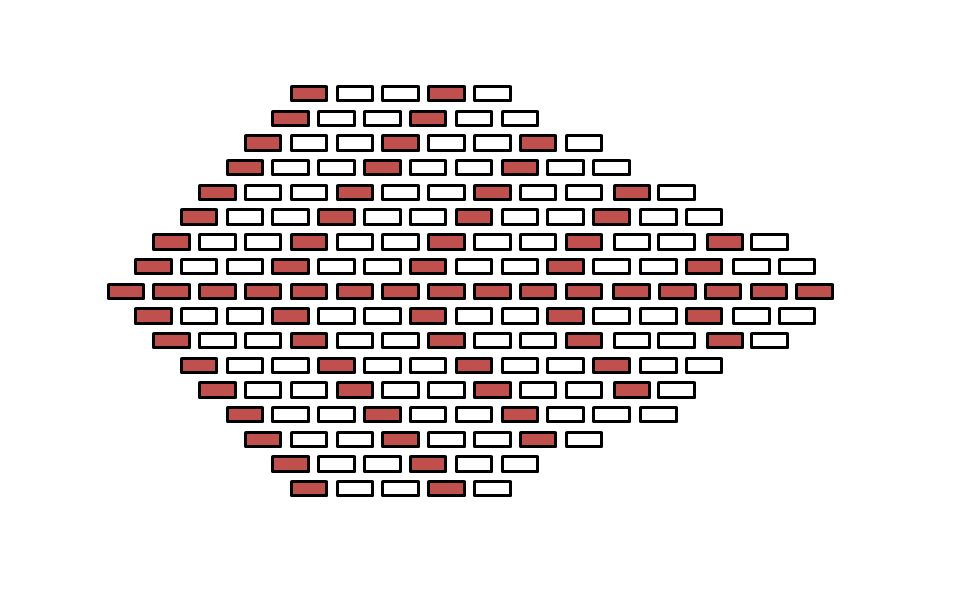
Figure 1 shows a leaf pattern made in brick stitch. It is a reasonably complex pattern with quite a bit of shaping.
Note that on the left hand side the shaping is very regular – the widest point is at the middle of the leaf and each row on either side of this wide point reduces by a single bead to create an even slope.
On the right hand side, the shaping is different: note that some rows are one bead less than their neighbours, whilst other rows start, or finish, two beads early.
The following instructions will give a guide to dealing with this shaping and reading brick stitch patterns in general.
Point 1 – identifying where to start
When you are going to start a brick stitch pattern, take a look at the overall shape first in order to decide where it is going to be easiest to start.
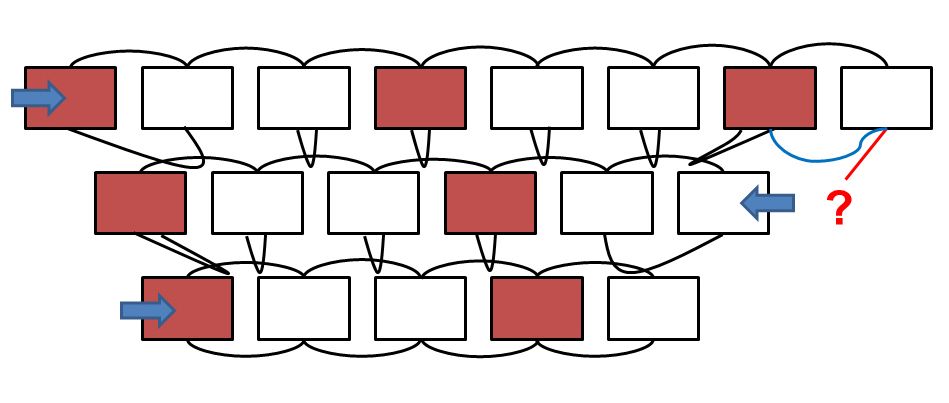
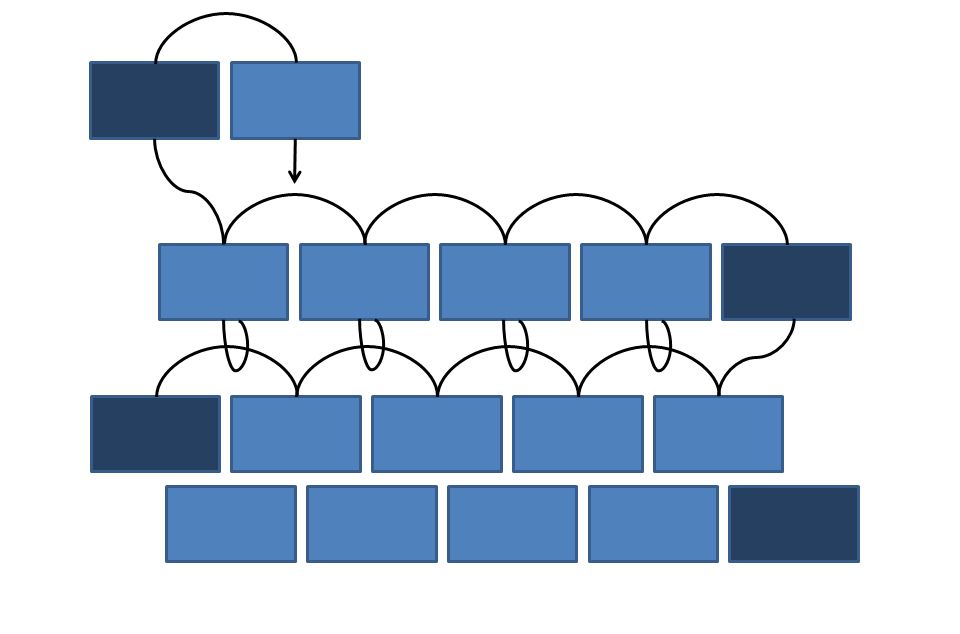
In many patterns you can simply start at the bottom of the shape and work upwards, row by row. However, there are occasions when this is not the most sensible place to start. If you look at the leaf pattern in figure 1, you will see that you could start with a ladder stitch row for the bottom row (this would contain 5 beads), then row 2 has 6 beads, so you can add the single overhang bead at each end of the row. However, row 3 then creates a problem: when you get to the end on the right, the final bead has no thread to link from (see figure 2). You could get around this problem if you are working the row from left to right – just add the final bead using ladder stitch, but if you are working the other way, it is going to feel trickier to add that bead – you would need to add beads 2 and 3, then go back and add bead 1, then go back to work the rest of the way along the row. Look carefully at figure 2 and see if you can work this out so you understand the issue.
In this instance, I decided it was easiest to just start with the widest row - the middle row – and work first one side, then the other. If I find a pattern with an uneven or awkward pattern of increases or decreases, I usually look for the longest row and start from there, working above and below it as necessary.
Point 2 – identifying where to finish a row
Given the irregular shaping on the right hand side of the leaf, you need to be able to identify the point at which to stop a row as well. Bear in mind that you will be working rows from left to right, then right to left. Take a look at figure 3: the blue arrows indicate the direction in which the row is worked. When you stitch row 3, you will be working from left to right, but if you look carefully at the pattern, this row decreases by an extra bead, so on the right hand side, it finishes two beads shorter than row 2. Once you have identified this, it is easy to see where to stop: you want to end up with a thread that has no bead attached at the end of the row (this empty thread is highlighted in red).
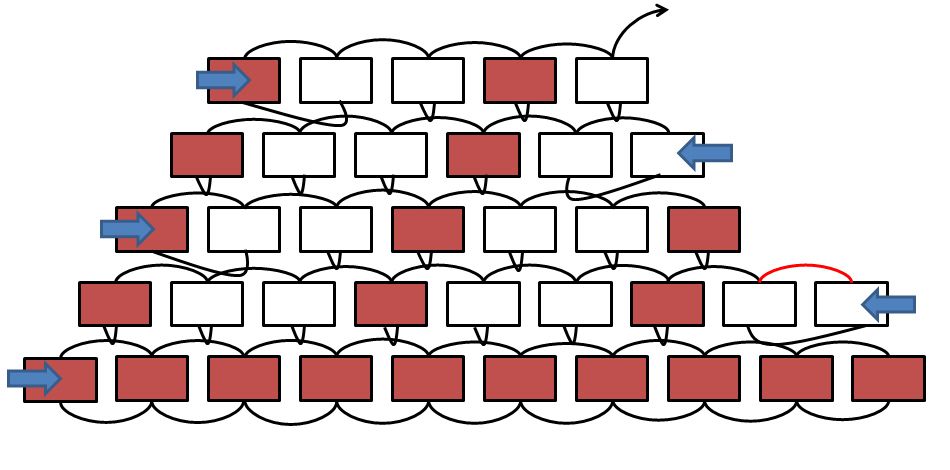
For all the other rows in this sample, the new row is just one bead shorter than the previous row, so you will need to have a bead sitting on top of each thread.
Point 3 – starting new rows with a decrease pattern
Normal brick stitch is worked so that you are exiting from the final bead in your row: you pick up 2 beads, pass under the first visible thread and up through the second bead. This means that you will have an overhanging bead at the start of each row. See this illustrated in figure 4 (the overhanging bead is in a darker blue).
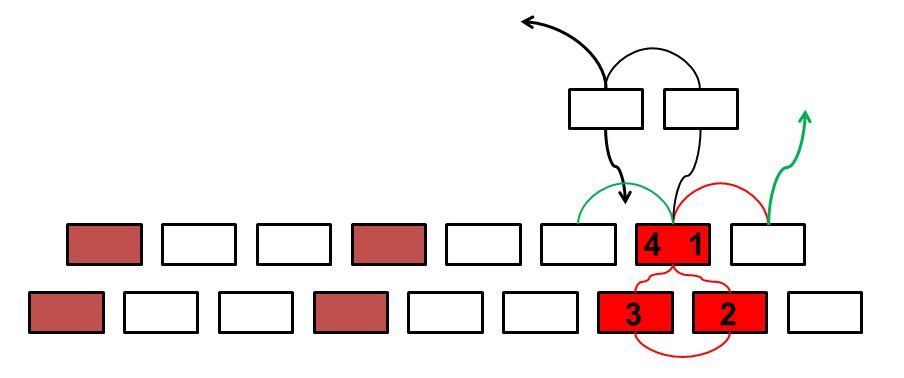
You should have noticed that the leaf has no overhanging beads. In order to achieve this, you will need to take care to make sure you manoeuvre to exit from the correct bead every time you finish a row. You will still need to pick up 2 beads to start the row, so if you want the row to begin one bead in from the previous row, then you will need to ensure that you are exiting from the second bead from the end, not the end bead, before you add your two beads to commence the row. To get to this point from the end bead where you are exiting (shown by the green arrow), you will need to weave down through two rows and back up out of the bead you need. You will be weaving through the beads illustrated in red and numbered one to four in figure 5, following the red thread path. When you begin the next row, you will be hooking under the second thread from the end (highlighted in green).
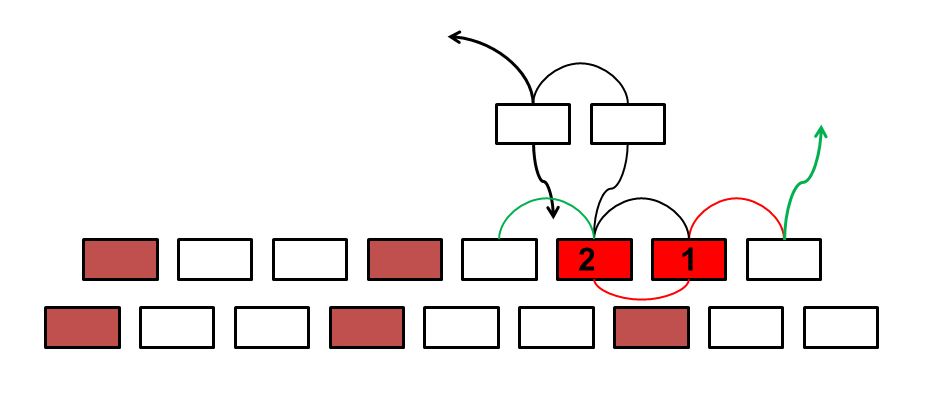
If you need to start a row that has decreased by 2 beads, you will need to start adding new beads exiting from the bead that is two from the end, so if you have finished the row exiting from the end bead (indicated by the green arrow), just weave down through the second bead (labelled 1 and coloured red) and up through the third bead (labelled 2 and coloured red). When you add your first two beads to start the next row you will be hooking under the third thread from the end (highlighted in green). See figure 6.
The same rules apply wherever you need to start a row inset from the previous row: work out which thread you will need to hook under and find a thread path through the beads to take you out of the bead that is immediately before that thread, then pick up your 2 beads to start the row. If you are wondering where to finish a row, again just count how many threads will not have a bead attached and then follow that guide.
Over to you...
Step 1: Make six leaves following the pattern in figure 7 and working with your Delica beads. Mix up the shades of green randomly as you stitch each leaf.
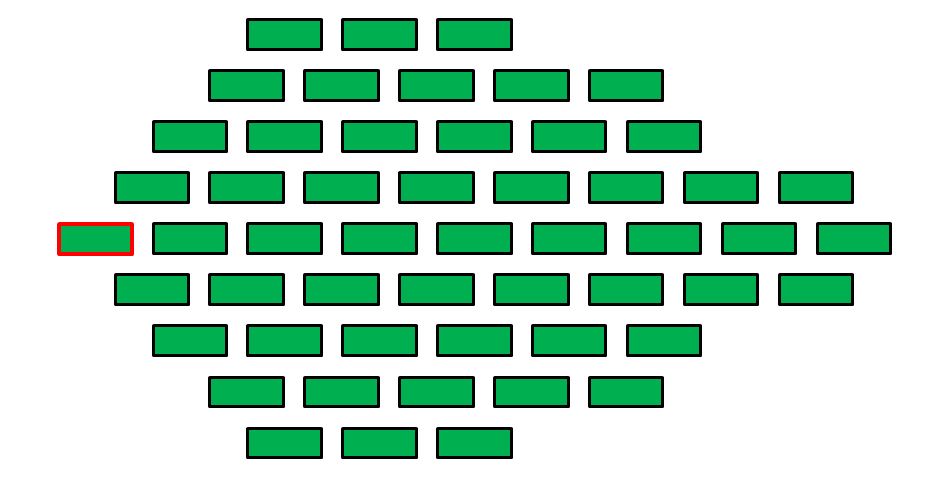
Step 2: To assemble the earring, first join your leaves into two groups of three. Stitch through the bottom bead in each leaf (outlined in red in figure 7), so that all three leaves are joined into a circle with a small hole in the centre. Reinforce the thread path through the joining beads to make sure it is secure before finishing your thread.
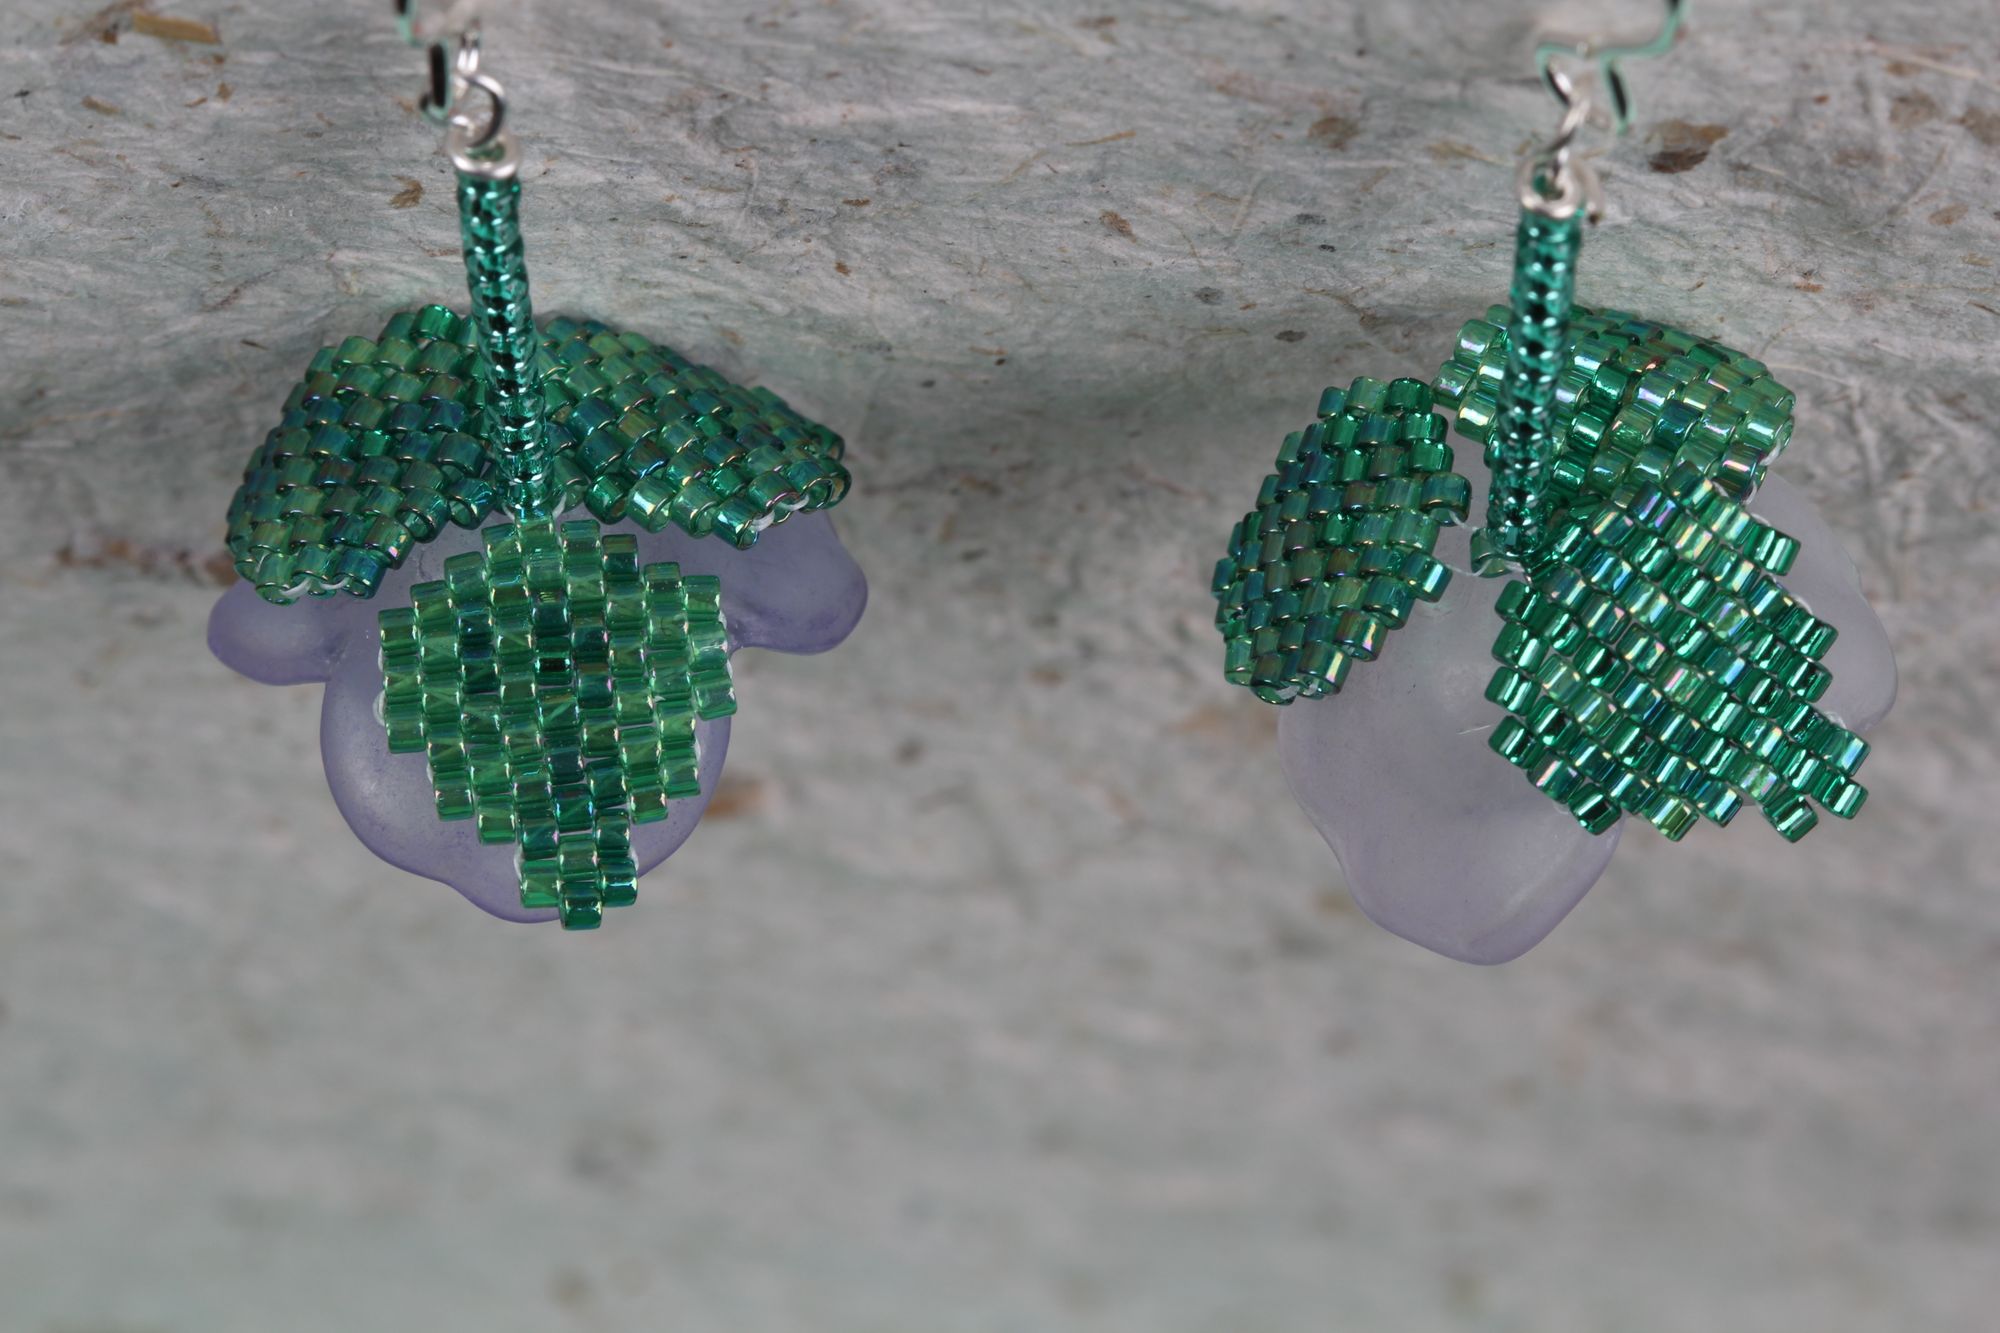
Step 3: Take your first headpin and string on a 3mm round bead, a Lucite flower, then pass the pin through the central hole in your leaf group, then add 12 size 11 beads. Make a wire wrapped loop to secure everything onto the headpin.
Step 4: Repeat step 3 with your remaining components, then attach an ear wire to the wire wrapped loop on each head pin and your earrings are ready to wear.
